
Introduction
Everything in ACI is managed as an Object. Each object belongs to a certain Class. As an example, when we create a VLAN Pool, we create an object that belongs to Class VlanInstP. Classes, in turn, are organized in Packages, Class VlanInstP belongs to Package fvns (fv = fabric virtualization, ns namespace). Figure 1-1 illustrates the classes that we are using in this chapter when we create Fabric Access Policies. Lines with an arrow represent Parent-Child structure and dotted lines represent a relationship (Rs) between classes. We will get back to Rs in becoming sections.

Figure 1-1: ACI Fabric Access Policies.
In this chapter, we are going to create a simple Fabric Access Policy that allows VLAN Ids from 300 to 399 to be used in Virtual Machines within standalone ESXi hosts (no ACI-vSphere integration) that has LLDP enabled 10Gb Uplink. This policy is then added to interfaces Eth 1/1-5 in switches Leaf-101 and Leaf-102. The actual configuration can be done in a different order than what I’m using here but the principles are still the same.
Before moving to the configuration, we open the built-in API Inspector of APIC, which can be used for studying the REST calls after submitting the configuration. You can open it by clicking the cogwheel icon on the upper right corner and by selecting the “Show API Inspector” from the drop-down menu. We will use the API Inspector later in detail.

Figure 1-2: Open API Inspector.
Each example will start by showing the GUI configuration related
to the section and then we analyze the REST call that happens when the configuration
is submitted.
Step 1: Create VLAN Pool
A VLAN Pool is a Fabric Access Policy object that defines the VLAN range that can be used with a specific domain. These domains can be (a) Physical Domain used with Bare Metal servers, Appliances, and so on, (b) Virtual Machine Management (VMM) used with hypervisor management systems like vSphere, (C) L3Out used with L3 external connection, and (d) L2Out used with external L2 connections.
Adding VLAN Pool by using GUI
Open the “Fabric” page and select “Access Policies” from the menu bar. Navigate to VLAN sub-folder under Pools in the “Policies” folder tree. Click the “Tools” icon and select “Create VLAN Pool” from the drop-down menu.

Figure 1-3: Adding VLAN Pool: Step 1.
In the “Create VLAN Pool” window, give the name for the VLAN Pool and click the “Plus” sign in the “Encap Blocks” bar. The name of the VLAN Pool in our example is “ESXi_VLP”.

Figure 1-4: Adding VLAN Pool: Step 2.
Specify the VLAN range that this Pool is using and select allocation mode (we are using Static Allocation), and then click the “Ok” button.

Figure 1-5: Adding VLAN Pool: Step 3.
By clicking the “Ok” button, you are forwarded back to the “Create VLAN Pool” window where you can submit your configuration.

Figure 1-6: Adding VLAN Pool: Step 4.
After submitting the configuration, you are forwarded back to “Pools – VLAN window” where we started the process.

Figure 1-7: Adding VLAN Pool: Verification.
APIC REST API
Now it's time to take a look at the API Inspector and check what happened behind the scene when we did our GUI based configuration. We created an object (URL https://apic-ip/api/node/mo/uni/infra/) by using the POST method and payload encoded in the JSON data format.

Figure 1-8: API Inspector.
I have modified the payload by using JSON Plugin in Notepad ++. The created object belongs to the class VlanInstP (VLAN Pool). It has a Relative Name (RN) which defines the name of the object. The format of an RN is Prefix1-[name]-Prefix2, where the Prefix1 is “vlanns” (vlan namespace) and the Prefix2 is “allocation mode”. This gives the RN vlans-[ESXi_VLP]-static. The Distinguished Name (DN) describes also the location of the object in the Management Information Tree (MIT).
We also created a Child object EncapBlk (Range) that specifies the VLAN range. The format of an RN for this object is Prefix1-[from]-Prefix2-[to], where the Prefix1 is “from” and the Prefix-2 is “to”. This gives us the RN “from-[vlan-300]-to [vlan-399]”. The Distinguished Name (DN) describes also the location of the object in the Management Information Tree (MIT) as it does in the case of every object we will later create.

Figure 1-9: REST Payload in JSON Data Format.
Figure 1-10 illustrates the object model for VLAN Pool creation.

Figure 1-10: Object Model for VLAN Pool.
The next section describes how we can use the REST call for creating the VLAN Pool with POSTMAN.
Adding VLAN Pool by using REST call with JSON Format
Before we can manage APIC with via REST API we need to do the authentication process. For this purpose I am setting up a Postman Environment where I use three variables, (a) The IP address of APIC, (b) username, and (c) password. This way the variable name can be used in REST calls instead of showing the APIC ip address and its username/password combination.

Figure 1-11: Setting up the POSTMAN Environment.
Figure 1-12 illustrates successful authentication. It also shows the token that is used for this connection.

Figure 1-12: Successful Authentication, Code 200 Ok.
Long story short, now it is time to create VLAN Pool via REST API. We can copy the URL from the API Inspector and paste it to the Postman URL field. The Payload can also be copied and also modified with Notepad ++ (or your favorite editor) into a more readable form and then pasted into the Payload field. The HTTP method is POST and the payload format is JSON.

Figure 1-13: API Inspector: POST URL and Payload.
Figure 1-14 shows the Method, URL, and Payload in our REST call. I have added an attribute “descr” with the value “Configured by using REST call” so we can verify that the object is actually added using REST API (as can be seen in Pools –VLAN window in APIC GUI).
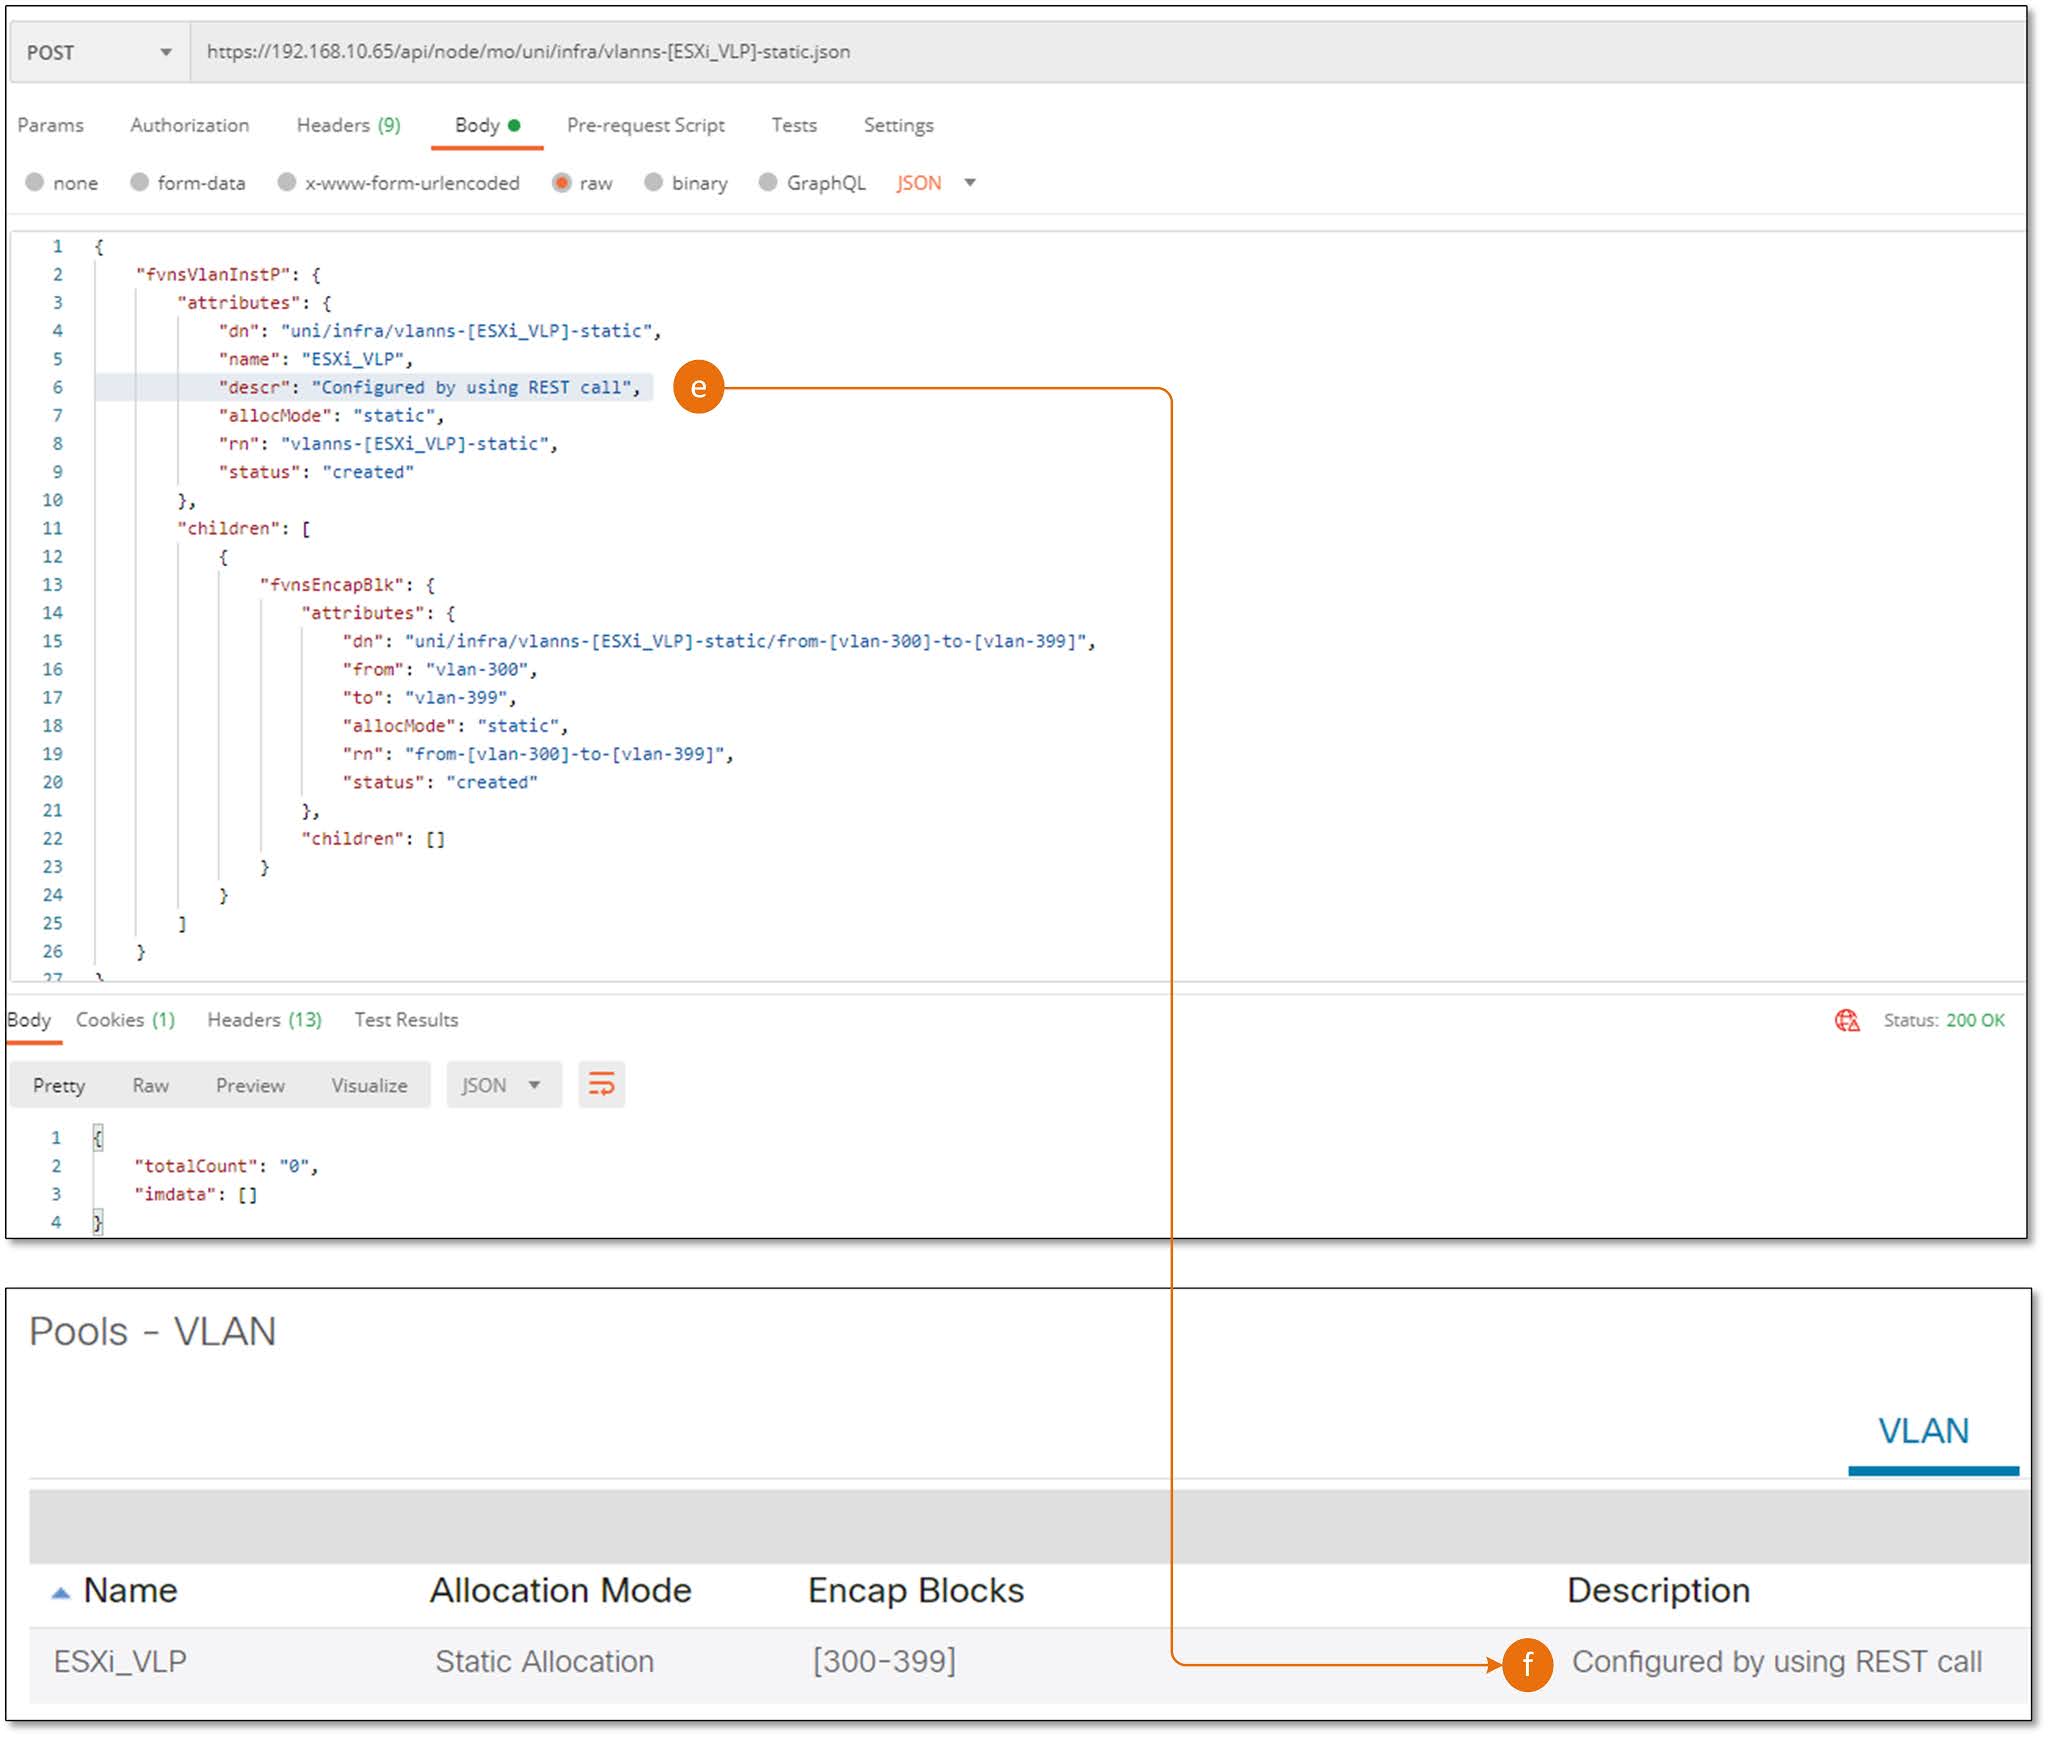
Figure 1-14: API Inspector: POST URL and Payload.
To be continued on the next post which is about Domains...
No comments:
Post a Comment